I’m sorry for starting this with a silly pun… I couldn’t help myself. Moving on…
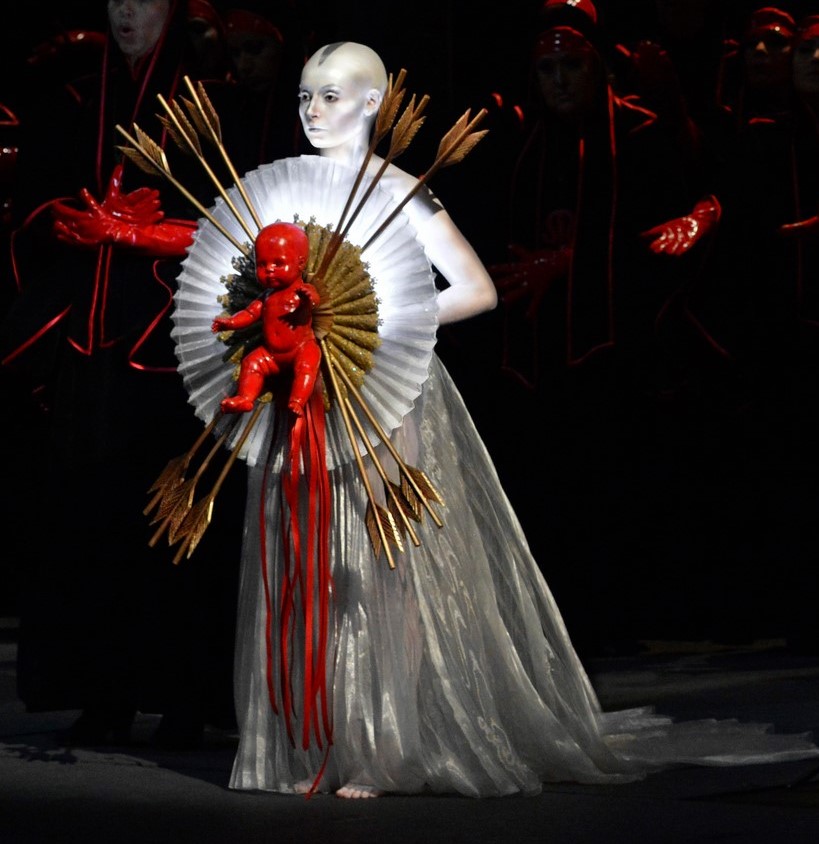
I wanted to share my process so far on working out how I want to design the witch from the Macbeth design I chose. There will be images of my process, as well as me annotating what I am thinking, and what I think I should try, as well as some feedback from my tutor.
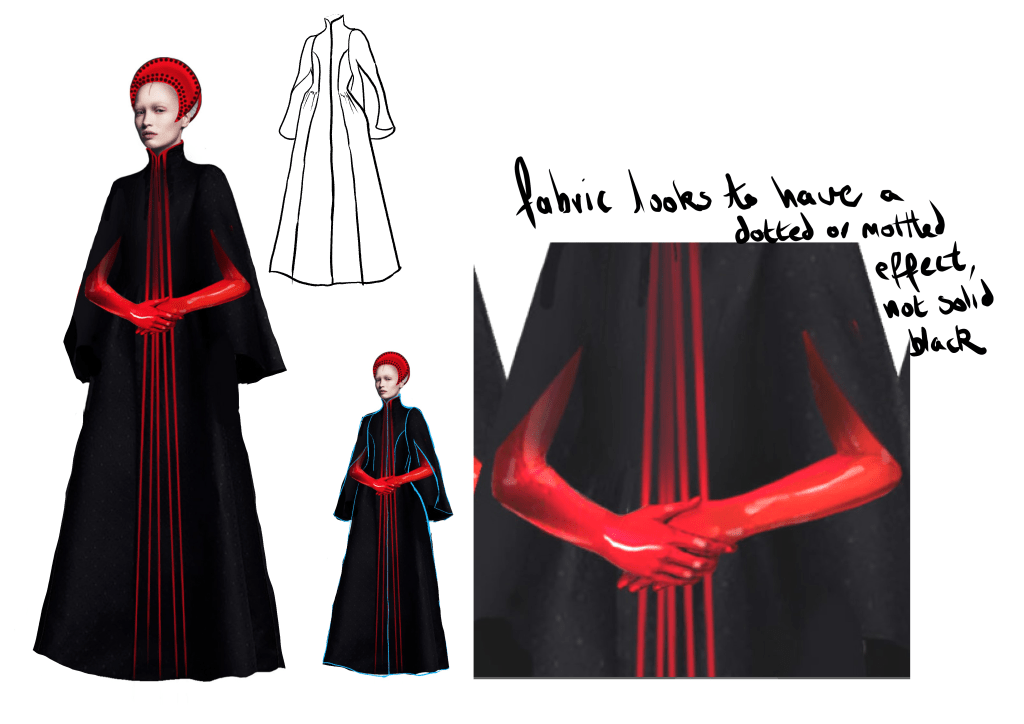
My starting process is pretty simple – I like to zoom right in, and then ajust brightness and levels contrast to see if there is any details that I may have missed. This is a particuarly important step if you have downloaded your image from the internet, as most are at 72ppi on terms of quality. This means the image can be super compressed, and just isn’t as detailed as detailed as having an original copy of the design.
From there, I made a new layer in photoshop, and drew in where I think seam lines should be, what shapes they might be, darts, etc. Once I have a rough idea of that, I then work on creating a proper flat lay pattern.
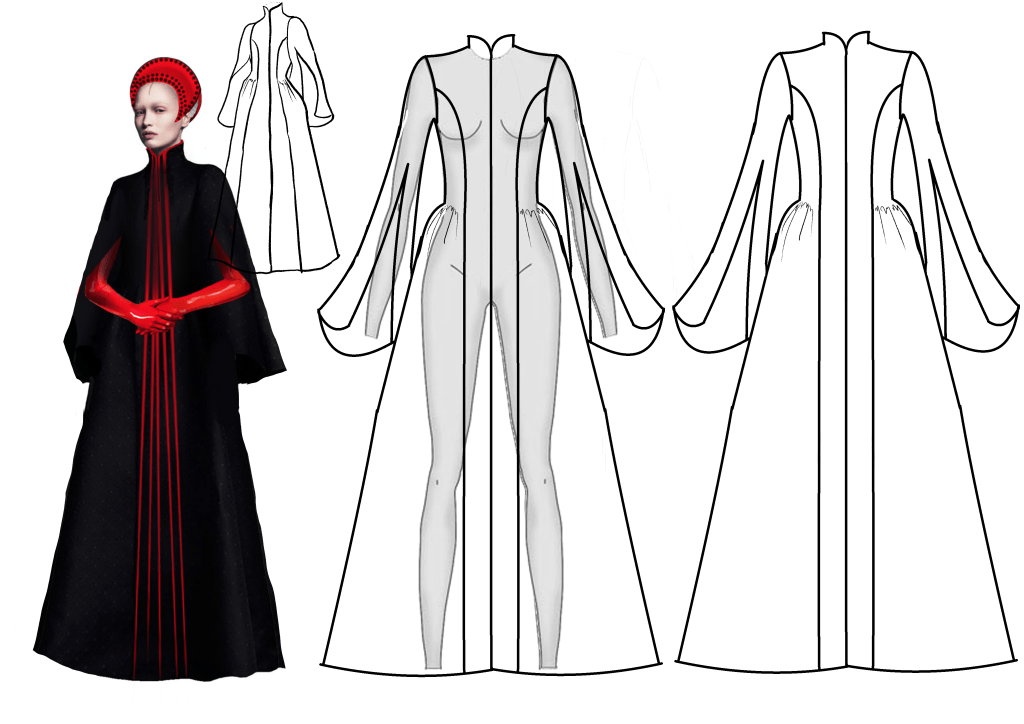
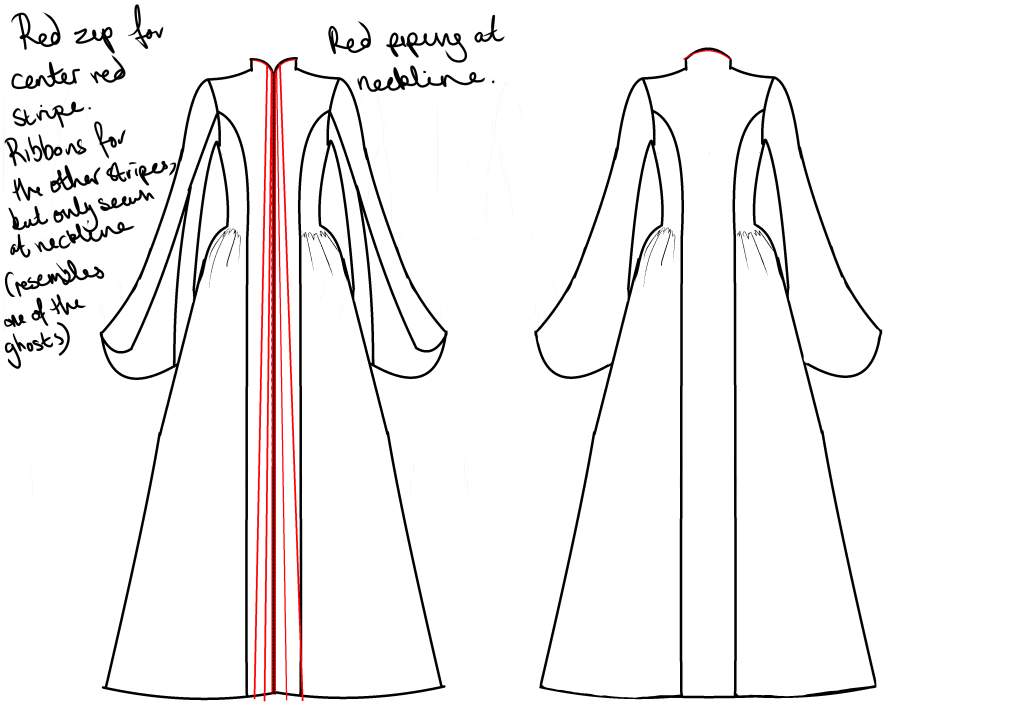
Here was my first try on the flat lay – as the figure is slightly turned to the side in the original design, I made sure to have a completely front on body to work out how I would like to position the seams, darts, details, etc. The sleeves I originally wanted to create with the seam at the back, and just a straight open V shape at the front, but later you will see I change this so match the sleeve going into the princess seam at the bust. Although in dark fabric, on stage, you’re unlikely to notice either seam, I thought this would create a really nice angular cut though the entire body. That said, my tutor has recommended looking at different sleeves, including ”free floating sleeves” which is going to be my next point of research.
Until next time, stay crafty!

Leave a comment